
Why Test a UTV Suspension Prototype Before Production?
UTV suspension prototype testing should answer more than one question: “Does the new shock fit?”
A suspension prototype can install correctly and still have the wrong spring rate, insufficient compression travel, excessive droop, unsuitable damping, poor reservoir clearance, or unacceptable behavior under cargo.
That is why production approval should come after a controlled validation process.
A useful sequence is:
Drawing Review → Installation → Ride Height → Sag → Full Bump → Full Droop → Load Test → Dynamic Test → Extended-Duty Test → Inspection → Revision → Production Approval
The purpose is not to make the prototype survive the most extreme abuse possible.
The purpose is to confirm that the suspension performs correctly in the conditions for which the vehicle is actually being developed.
What Should Be Checked Before Installation?
Start by confirming that the prototype matches the engineering specification.
Check:
| Item | What to Verify |
|---|---|
| Prototype revision | Correct development version |
| Extended length | Matches drawing |
| Compressed length | Matches target |
| Shock stroke | Correct specification |
| Upper mount | Correct type and dimensions |
| Lower mount | Correct type and dimensions |
| Spring | Correct prototype version |
| Preload | Recorded before installation |
| Adjusters | Correct configuration |
| Reservoir | Correct type if included |
| Hose routing | Correct orientation |
| External condition | No visible damage |
This becomes especially important when several prototype revisions are being tested.
If Prototype A, B, and C use different spring or damping specifications, every test result must be linked to the correct physical sample.
Record the Vehicle Setup Before Testing
Suspension feedback is difficult to compare without a controlled baseline.
Record:
- Vehicle model or platform
- Vehicle curb weight
- Front axle load
- Rear axle load
- Passenger load
- Cargo load
- Tire size
- Tire pressure
- Spring specification
- Preload
- Compression setting
- Rebound setting
- Test terrain
- Test duration
A comment such as:
“Prototype B feels better.”
has limited engineering value.
A better record is:
“Prototype B was tested with two passengers, 180 kg rear cargo, the same tire pressure and the same rough-road route as Prototype A. Rear bottoming was reduced, but driver-only ride became noticeably firmer over small bumps.”
Now the supplier knows what changed.
Stage 1: Check Static Fitment
Install the suspension and inspect the vehicle before driving.
Check the upper and lower mounting locations carefully.
The prototype should fit without forcing the shock, bushings, brackets, or bolts into position.
Look for:
- Mounting interference
- Incorrect bushing width
- Incorrect bolt diameter
- Spring contact
- Shock-body contact
- Chassis clearance
- Reservoir clearance
- Hose interference
- Adjuster accessibility
A shock that fits at ride height can still interfere when the wheel moves.
Static installation is therefore only the first step.
Stage 2: Measure Ride Height
Measure vehicle ride height before and after installing the prototype whenever possible.
Use consistent reference points.
Possible measurements include:
- Chassis-to-ground height
- Wheel-center-to-body reference
- Shock installed length
- Front/rear vehicle attitude
An unexpected ride-height change can indicate:
- Different spring rate
- Excessive preload
- Incorrect shock dimensions
- Different static sag
Do not rely on appearance alone.
Write the measurements down.
Stage 3: Measure Sag Under Real Loads
Sag shows where the suspension sits within its available travel.
The vehicle should not be evaluated only when empty if it normally carries passengers or cargo.
Test several relevant conditions.
Vehicle Only
Provides a baseline.
Driver Only
Shows normal light-load operation.
Typical Passenger Load
Important for two-seat and four-seat UTVs.
Normal Working Load
Include the cargo, tools, battery equipment, or accessories typically carried.
High Realistic Operating Load
Where relevant, test a heavier intended operating condition while remaining within the vehicle's approved limits.
There is no single universal sag percentage that should be applied to every UTV.
The important question is:
Does the vehicle retain enough usable compression and extension travel in its normal operating condition?
If normal cargo pushes the rear suspension deep into its available travel before the UTV even moves, spring support should be reviewed.
Stage 4: Check Full Compression
Before aggressive terrain testing, evaluate the suspension near full bump under controlled conditions.
Check:
- Shock compressed length
- Bump-stop engagement
- Remaining shock travel
- Spring compression
- Tire clearance
- Control-arm clearance
- Chassis clearance
- Reservoir clearance
- Brake hose position
- Steering clearance
A shock should not unexpectedly become the mechanical stop for the entire suspension.
If the damper reaches its internal compression limit before the suspension reaches its intended bump-management point, the dimensions need further review.
Changing damping does not create missing physical stroke.
Stage 5: Check Full Droop
Full extension matters just as much as full compression.
Check:
- Shock extension
- CV joint angle
- Axle movement
- Ball-joint articulation
- Tie-rod position
- Brake hose length
- Sensor wiring
- Reservoir hose tension
- Tire clearance
A longer shock can allow more droop, but more droop is not automatically desirable.
Another component may reach its safe mechanical limit first.
This is especially important for long-travel UTV development.
Stage 6: Evaluate the Spring Before Tuning Damping
The spring and damper perform different jobs.
The spring supports the vehicle. The damper controls suspension movement.
If the rear of the UTV sits too low under normal cargo, the problem may not be solved by adding compression damping.
During UTV suspension prototype testing, check whether the spring:
- Maintains acceptable ride height
- Supports normal payload
- Leaves sufficient bump travel
- Requires excessive preload
- Works acceptably when the vehicle is unloaded
- Remains compatible with the shock throughout travel
This prevents damping changes from being used to hide an incorrect spring specification.
Stage 7: Begin With a Low-Speed Functional Test
The first drive should be controlled.
Do not immediately take a new prototype into the most severe terrain available.
Listen and feel for:
- Binding
- Clunks
- Tire contact
- Steering interference
- Unusual spring noise
- Hose contact
- Mount movement
- Unexpected body motion
Stop after the first short drive.
Inspect the prototype again.
Check for:
- Loose hardware
- Fluid leakage
- Contact marks
- Hose abrasion
- Reservoir movement
- Spring contact
Finding a basic installation problem early can prevent damage during later testing.
Stage 8: Use a Repeatable Test Route
Once the suspension is mechanically safe, establish a route that can be repeated between prototype revisions.
A useful route might contain:
- Small repetitive bumps
- Medium bumps
- Larger controlled compression events
- Rough uneven ground
- Braking
- Acceleration
- Cornering
- Repeated suspension cycling
The same prototype should not be compared on completely different terrain if you want meaningful engineering feedback.
Prototype A tested on a rough rocky road and Prototype B tested on smooth gravel do not provide a useful comparison.
What Should the Driver Evaluate?
Avoid simply asking whether the driver likes the suspension.
Ask specific questions.
Small-Bump Comfort
Does the suspension react harshly to small repetitive irregularities?
Compression Control
Does it move too quickly through its available travel?
Bottoming
Does the suspension frequently reach the bump region under conditions it is expected to handle?
Rebound Recovery
Does the suspension return in a controlled manner after compression?
Repeated Bumps
Can the wheel and body recover before the next bump arrives?
Body Control
Observe excessive pitch, roll, or repeated oscillation.
Wheel Control
Does the wheel remain composed over uneven terrain?
Specific feedback gives the supplier something that can actually be tuned.
Stage 9: Test Both Unloaded and Loaded
A utility UTV suspension should rarely be approved from one load condition.
For example:
| Test Condition | Main Purpose |
|---|---|
| Driver only | Light-load ride |
| Normal passengers | Passenger balance |
| Typical cargo | Working condition |
| Higher realistic load | Remaining bump travel |
| Cargo removed | Confirm unloaded compromise |
A shock may work extremely well with cargo but feel unnecessarily harsh when the vehicle is empty.
The opposite can also happen.
A suspension prototype should be evaluated around its intended operating range rather than a single convenient test condition.
Pay Attention to Axle Load
Payload is useful, but it does not tell you where the weight is located.
Imagine placing 200 kg of cargo close to the center of the vehicle.
Now move that same mass farther toward the rear.
The total payload has not changed.
Rear suspension load has.
For development projects, front and rear axle loads provide much more useful information.
This matters for:
- Cargo UTVs
- Four-seat UTVs
- Electric UTVs
- Battery conversions
- Tool vehicles
- Sprayer vehicles
- Towing applications
Suspension reacts to how mass is distributed around the vehicle.
Stage 10: Test on Representative Terrain
The test should reproduce the actual application.
If the UTV will work on farm roads, include farm-road conditions.
If it will be used on rocky trails, test relevant rocky terrain.
If the vehicle operates on repeated washboard surfaces, include that in the validation process.
Possible environments include:
- Farm roads
- Gravel
- Rocky trails
- Forest tracks
- Washboard roads
- Construction sites
- Mine roads
- Sand
- Mixed road/off-road operation
A prototype designed for rough working conditions should not be approved after driving only around a smooth workshop yard.
Stage 11: Reproduce the Real Duty Cycle
Test duration can matter as much as terrain.
Consider two scenarios:
Vehicle A: 10 minutes of occasional rough-road use.
Vehicle B: 90 minutes of continuous suspension cycling on uneven work roads.
The damping requirement can be very different.
A complete UTV suspension prototype testing process should therefore reproduce the duty cycle that matters to the buyer.
This becomes particularly relevant when evaluating:
- Reservoir shocks
- Heavy-duty UTVs
- Long rough-road operation
- Repeated high-frequency suspension movement
- Performance-oriented off-road applications
If the original complaint only appears after extended operation, a five-minute test cannot confirm that the problem has been solved.
How Should Adjustable Shocks Be Tested?
Change one variable at a time.
Use this process:
Baseline → Test → Adjust One Setting → Repeat Test → Record Result
Suppose the shock has compression and rebound adjustment.
Do not simultaneously change:
- Compression
- Rebound
- Spring preload
- Tire pressure
- Vehicle load
If you do, it becomes almost impossible to know what caused the difference.
Start with the supplier's recommended baseline.
Record every setting.
Then make controlled changes.
Can Video Help With Prototype Evaluation?
Yes.
Video can help document:
- Wheel movement
- Shock travel use
- Body movement
- Tire contact
- Bottoming
- Rebound
- Front/rear suspension balance
For an overseas OEM development project, short videos can make supplier feedback considerably clearer.
Send the video together with test conditions.
For example:
“Rear suspension video: Prototype C, 160 kg cargo, compression setting 6 clicks from closed, same rocky route used for Prototype B.”
That is much more useful than sending an isolated video with no context.
Inspect the Shock After Dynamic Testing
Vehicle testing is not finished when the UTV stops.
Inspect the prototype afterward.
Look for:
- Oil leakage
- Loose bolts
- Mount movement
- Bushing movement
- Spring interference
- Hose rubbing
- Reservoir movement
- Tire contact
- Chassis marks
- Damaged surfaces
- Abnormal wear
Take photographs.
A suspension can feel acceptable during the drive and still reveal a mechanical problem during inspection.
Define Pass/Fail Criteria Before Production
A prototype should not be approved simply because the driver says it is acceptable.
Define rejection conditions.
These may include:
- Incorrect fitment
- Unacceptable ride height
- Excessive sag
- Insufficient bump clearance
- Unsafe droop
- Persistent leakage
- Mounting interference
- Hose interference
- Frequent bottoming
- Poor rebound control
- Unacceptable loaded behavior
- Loosening hardware
- Unresolved left/right inconsistency
The exact criteria depend on the project.
The important point is to define them.
Does Every Prototype Need Durability Testing?
The required validation scope depends on the project, market, vehicle application, development stage, and buyer's own requirements.
A prototype fitment sample may have a different purpose from a production-intent validation sample.
Buyers should therefore define what each sample is intended to prove.
For example:
Prototype 1
Main goal:
- Confirm dimensions
- Confirm mounting
- Confirm travel
- Establish initial spring/damping direction
Prototype 2
Main goal:
- Validate revised spring
- Validate revised damping
- Check loaded behavior
- Confirm clearance
Production-Intent Sample
Main goal:
- Confirm final specification
- Confirm final hardware
- Validate relevant vehicle performance
- Establish production reference
This staged approach avoids trying to answer every engineering question with one first sample.
Prototype Testing and Production QC Are Different
Prototype validation asks:
Is this the correct suspension specification?
Production quality control asks:
Are all production parts being made consistently to that approved specification?
The first may focus on:
- Vehicle behavior
- Spring rate
- Damping
- Fitment
- Travel
- Clearance
Production control may focus on project-specific requirements such as:
- Dimensions
- Spring identification
- Assembly
- Damping consistency
- Leakage
- Mounting hardware
- Finish
- Packaging
- Traceability
A successful prototype does not remove the need for production quality control.
Should a Revised Prototype Be Tested Again?
Yes when the change can materially affect vehicle behavior or fitment.
For example, suppose Prototype A requires:
- Different spring rate
- Shorter extended length
- Revised rebound damping
These are meaningful engineering changes.
The next step should normally be:
Prototype A → Test Findings → Engineering Revision → Prototype B → Confirmation Test
Production should not be approved simply because the drawing now shows the requested changes.
The revised physical product needs appropriate validation.
What Should Be Frozen Before Production?
Before releasing a suspension project for production, document the approved configuration.
That may include:
- Final drawing revision
- Extended length
- Compressed length
- Stroke
- Mounting dimensions
- Spring specification
- Preload reference
- Damping specification
- Adjustment baseline
- Reservoir configuration
- Hose configuration
- Finish
- Part identification
- Packaging requirements
If the prototype worked because of a specific spring and damping combination, those details need to become part of the production specification.
Otherwise, “make it like the sample” is too ambiguous.
How Does Prototype Testing Reduce Purchasing Risk?
Good UTV suspension prototype testing can identify problems while the project still involves a small number of samples.
Possible issues include:
- Incorrect shock length
- Wrong mounts
- Incorrect spring support
- Insufficient travel
- Excessive droop
- Poor damping
- Reservoir interference
- Hose-routing problems
- Unsuitable loaded performance
Before mass production, these issues may require another prototype revision.
After production, the same issue can involve inventory, international freight, customer complaints, rework, or replacement.
Prototype validation is therefore both an engineering process and a purchasing-risk-control process.
What Should I Send the Supplier After Testing?
A useful feedback package should contain four parts.
1. Prototype Identification
Example:
Rear Shock Prototype – Revision C
2. Vehicle Condition
Include:
- Passenger load
- Cargo load
- Axle load where available
- Tire pressure
3.Suspension Setup
Include:
- Spring
- Preload
- Compression setting
- Rebound setting
4. Test Result
Do not write:
“Too soft.”
Write:
“With 180 kg rear cargo, the suspension reaches the bump region repeatedly over medium rough-road impacts. Driver-only operation is acceptable.”
Now the supplier knows exactly which condition needs improvement.
UTV Suspension Prototype Test Checklist
Before approving production,confirm:
- Prototype revision identified
- Extended length checked
- Compressed length checked
- Mounting checked
- Ride height recorded
- Sag checked
- Full bump checked
- Full droop checked
- Spring behavior checked
- Driver-only test completed
- Normal-load test completed
- Target terrain tested
- Duty cycle considered
- Adjustment settings documented
- Post-test inspection completed
- Problems documented
- Significant revisions re-tested
- Production specification frozen
This checklist is much more useful than approving a sample because it “looks correct.”
What Should I Ask a Suspension Supplier?
Before the prototypes arrive,ask:
- Which prototype revision are we receiving?
- What spring specification is installed?
- What preload should be used initially?
- What are the extended and compressed dimensions?
- What shock stroke should we verify?
- Is damping fixed or adjustable?
- What settings should we use as the baseline?
- What is this prototype specifically intended to validate?
- What feedback does your engineering team need?
- Which parameters can still be revised?
- Which parameters must be frozen before production?
- Will major revisions require another confirmation sample?
A capable supplier should be able to discuss the development process rather than simply asking whether the sample was acceptable.
How Can Bedo Auto Support a Prototype Project?
Buyers preparing an OEM or custom suspension program can organize their vehicle information before prototype development.
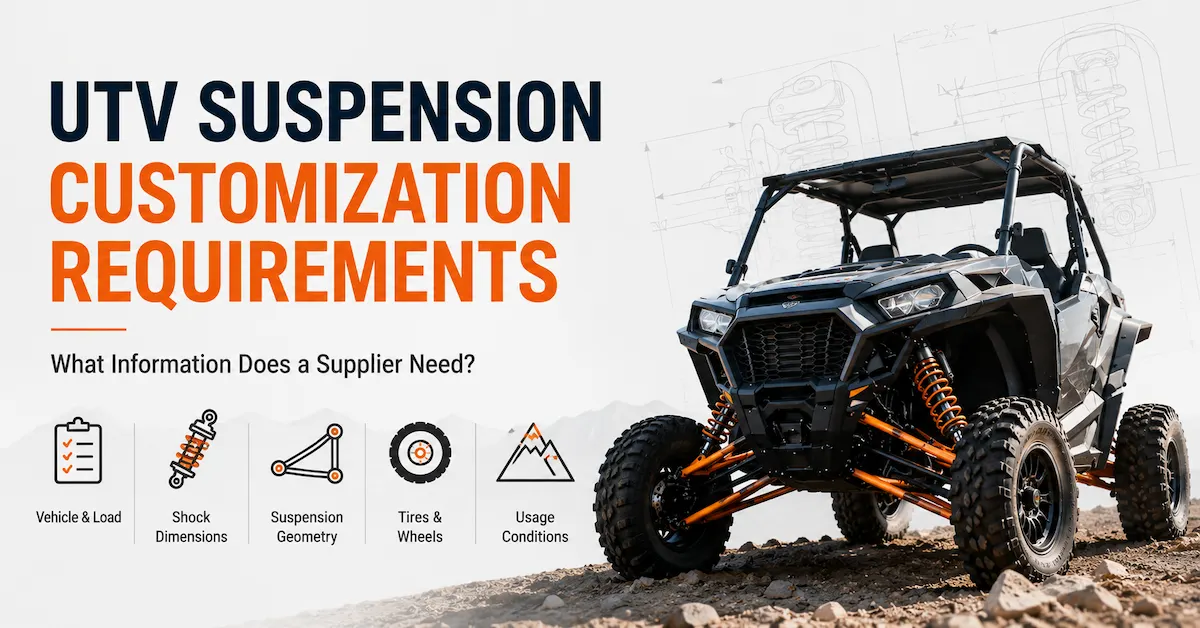
The guide to UTV suspension customization requirements explains what vehicle weight, dimensions, CAD, axle-load, terrain, and project information can help a supplier understand the application.
You can also review the Bedo Auto shock absorber range when planning a UTV suspension project.
For an active OEM, private-label, or custom-development inquiry, send the available technical package through the Bedo Auto contact page.
A useful inquiry might be:
“We are validating custom rear shocks for a utility UTV. We can provide vehicle weight, rear axle load, shock dimensions, spring data, CAD, normal cargo condition, and test-route information.We want to confirm sag, bump/droop clearance, loaded damping performance, and the final production specification.”
That tells the supplier what needs to happen next.
FAQ
What is UTV suspension prototype testing?
UTV suspension prototype testing is the process of validating a custom suspension sample for dimensions, fitment, ride height, sag, bump and droop clearance, spring support, damping, load performance, and application suitability before production.
Is one short UTV road test enough?
Usually not for an OEM development project. A short drive may confirm basic function but may not reproduce normal cargo, passengers, rough terrain, repeated bumps, or the required duty cycle.
Should I test the suspension loaded?
Yes, if the UTV will normally carry passengers, cargo, tools, or other equipment. Loaded conditions can significantly change ride height, sag, remaining bump travel, and damping behavior.
What should I check before driving?
Check dimensions, mounting, spring, preload, ride height, full compression, full droop, tire clearance, joint movement, reservoir position, and hose routing where applicable.
Should I test full bump and full droop?
Yes. A shock that fits at ride height can still create problems at either extreme of suspension travel.
How should I test adjustable UTV shocks?
Record the initial setup, change one setting at a time, repeat the same test route, and document the result before making another adjustment.
Should a revised shock prototype be tested again?
Meaningful changes to dimensions, spring specification, damping, travel, or installation should normally be confirmed on the vehicle before production approval.
What data should I send after prototype testing?
Send the prototype revision, vehicle load, axle loads where available, tire pressure, spring/preload setup, adjustment settings, terrain, speed, duration, observed behavior, photographs, and any post-test inspection findings.
When is a UTV suspension prototype ready for production?
It is ready when the required fitment, travel, load support, vehicle behavior, clearance, and project-specific validation have been completed and the final production specification is documented.
Conclusion
A UTV suspension sample should not reach production simply because it bolts onto the vehicle.
A controlled UTV suspension prototype testing process should confirm that the shock fits, supports the intended load, uses travel correctly, stays within bump and droop limits, and controls the vehicle on representative terrain.
Use this sequence:
Specification → Installation → Sag → Bump → Droop → Load → Terrain → Duty Cycle → Inspection → Revision → Confirmation → Production
Keep the vehicle setup documented.
Change one variable at a time.
Record the prototype revision.
Test the conditions that caused the original suspension problem.
And when spring, damping, or dimensions change significantly, validate the revised sample before production.
That turns prototype testing from a subjective test drive into a controlled OEM approval process—and gives both the buyer and supplier a much clearer production target.